
A
blinking red light on your wireless camera can instantly spike your anxiety
about home security. These devices typically fail for predictable reasons: dead
batteries, Wi-Fi dropouts, outdated firmware, or physical obstructions.
Environmental factors like extreme weather or signal interference from new
appliances often play hidden roles. Even simple oversights—like forgetting to
enable permissions in your security app—can render cameras useless. The good
news? Most issues are fixable without technical expertise. In this article,
we’ll walk through systematic checks to revive your camera, starting with the
most obvious culprits.

Is Your Camera Getting Power? Check These First
Test the Power Source & Charging Cable
Begin
by verifying whether your camera is receiving power at all. For wired models,
unplug and reseat the power adapter firmly into both the outlet and camera
port. Try a different outlet to rule out circuit breaker issues—sometimes a
tripped GFCI outlet in garages or bathrooms cuts power unexpectedly. Examine
the charging cable for frayed wires or bent connectors; damaged cables often
charge intermittently. If using a power-over-Ethernet (PoE) setup, ensure the
network switch delivers sufficient power. Solar-powered cameras need clean,
unobstructed panels—wipe away dust or snow with a soft cloth.
Inspect Batteries and Replace if Needed
Wireless
cameras with removable batteries often show subtle signs of power failure
before dying completely. Open the battery compartment and check for corrosion
on contacts—a white, powdery residue that disrupts conductivity. Clean contacts
gently with a cotton swab dipped in vinegar or rubbing alcohol. Lithium-ion
batteries degrade after 300–500 charge cycles; if your camera struggles to hold
a charge beyond a day, replacements are likely due. Always use
manufacturer-recommended battery types, as off-brand options may not deliver
consistent voltage.
Look for Blinking Lights or Error Indicators
Status
lights are your camera’s way of communicating problems. A steady red light
often indicates power but no Wi-Fi connection, while rapid blinking may signal
failed boot-up attempts. Consult your camera’s manual (or online documentation)
to decode light patterns—some models use color sequences for specific errors.
If lights don’t illuminate at all, the power supply is definitely the issue.
For cameras with screens, error messages like “IP conflict” or “storage full”
provide direct clues.
Is the Wi-Fi Connection the Problem?
Reboot Your Router and Camera
Wi-Fi
glitches account for nearly half of all wireless camera failures. Power-cycle your router by unplugging it for 30
seconds—this clears cached errors and re-establishes fresh connections. Restart
the camera simultaneously via its app or physical power switch. Ensure your
camera reconnects to the correct network band (2.4GHz or 5GHz); some devices
only support 2.4GHz. If your network recently changed passwords or encryption
types (e.g., WPA2 to WPA3), reconfigure the camera’s Wi-Fi settings manually.
For mesh systems, temporarily disable node hopping to test stability.
Check Wi-Fi Signal Strength & Interference
Weak
signals cause choppy feeds or disconnections. Stand near your camera with a
smartphone and use apps like Wi-Fi Analyzer to measure signal strength—aim for
at least -60dBm. Thick walls, metal siding, or fish tanks between the router
and camera can block signals. Reposition the router or add a Wi-Fi extender if
needed. Avoid placing cameras near microwaves, baby monitors, or cordless
phones that operate on 2.4GHz. For congested areas, switch your router to a
less crowded channel (e.g., channels 1, 6, or 11 for 2.4GHz).
Could It Be a Software or Settings Issue?
Update Firmware for Bug Fixes
Outdated
firmware can cripple functionality. Open your camera’s companion app and
navigate to the device settings menu to check for updates. Enable auto-update
features if available. Some cameras require manual updates via SD card—download
the firmware file from the manufacturer’s support site and follow instructions
precisely. Post-update, reboot the camera and test all features, especially
night vision and motion zones. Updates often resolve issues like false alerts
or failed recording triggers.
Reset Camera to Factory Settings
When
unexplained glitches persist, a factory reset wipes corrupted configurations.
Locate the reset button (usually a tiny pinhole) and hold it for 10–15 seconds
until the camera reboots. Reconnect it to Wi-Fi and reconfigure motion
detection zones, schedules, and user permissions from scratch. Note that this
erases all stored footage on local storage, so back up critical clips first.
Resets are particularly effective for cameras stuck in boot loops or showing
“offline” status despite good connectivity.
Verify App and Account Permissions
Security
apps sometimes lose camera access after phone OS updates. On Android, go to
Settings > Apps > [Your Camera App] > Permissions to ensure location
and microphone access are enabled. iOS users should check Privacy &
Security settings. For shared cameras, confirm all users have proper access
levels—accidental admin revokes can block feeds. Log out and back into your
account to refresh authentication tokens.
Is There a Hardware or Placement Problem?
Inspect for Physical Damage or Obstructions
Cracked
lenses or water inside the housing demand immediate attention. Look for
condensation behind the glass—a sign of compromised weather seals. Spider webs
or nests inside the casing can obstruct motion sensors; use compressed air to
clear debris gently. Test microphone and speaker functionality through the app
to confirm audio components work. For outdoor cameras, ensure mounting hardware
hasn’t loosened over time, causing misalignment.
Reposition the Camera for Better Signal
Even
small adjustments can improve performance. Elevate cameras facing Wi-Fi routers
directly, avoiding downward tilts that may angle antennas away from the signal
source. For outdoor models, reduce the distance to the router by 10–15 feet if
possible. Avoid mounting near large metal objects like HVAC units or aluminum
siding that reflect signals. Test different heights—sometimes placing cameras
at 7–8 feet high avoids ground interference while maintaining optimal motion
detection.
Conclusion
If
all troubleshooting steps fail, your camera may have irreparable hardware
failure—like a fried circuit board from power surges or failed infrared LEDs.
Before replacing, check warranty terms; many manufacturers offer 1–2 years of
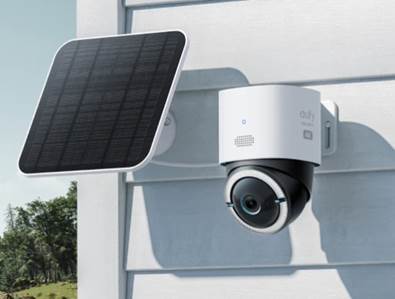
coverage. For those seeking reliable alternatives, brands like eufy provide a
wide selection of high-performance wireless cameras with features like local
storage, AI detection, and durable weatherproof designs. Whether you need to
monitor a front porch or a sprawling backyard, investing in a quality system
ensures long-term security without constant troubleshooting headaches.